Friday 15 May 2015

On Traveling With Your Camera


UPDATE: Feb. 26th, 2015 -- The New York City episode of The Traveling Photographer has just been posted.

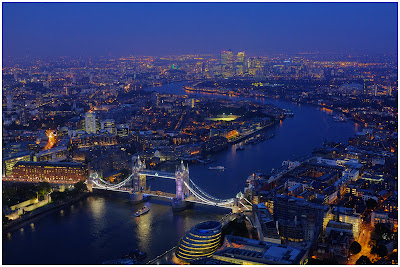
UPDATE: Dec. 12th, 2014 -- The London episode of The Traveling Photographer has just been posted.

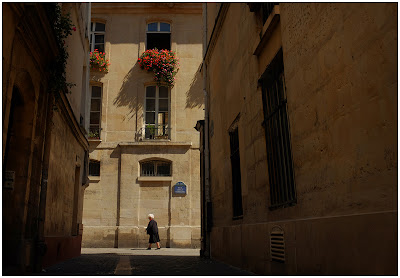
UPDATE: Nov. 15th, 2014 -- The Paris episode of The Traveling Photographer has just been posted.

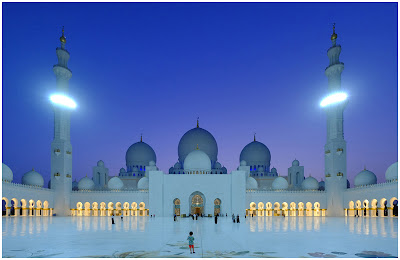
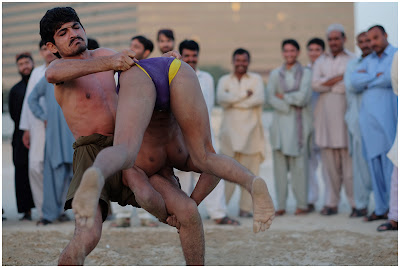
UPDATE: Sept. 7th, 2014 -- The Dubai episode of The Traveling Photographer has just been posted.


In January Strobist was restructured from a standard, 2x/week blog into a core knowledge archive. Rather than publishing all of the time, we made the 2,000-post archive more organized and accessible. Now, Strobist only updates when there is something meaningful to say.

I did this to flip the signal to noise ratio (seriously, who needs to read that many photoblog posts every day) and to create some time for two significant projects. The first of which, The Traveling Photographer, has just dropped.
__________


Introducing The Traveling Photographer

Here's the problem with most travel photography books: they are to some degree disingenuous. They play on the idea that you'd love to be a full-time travel shooter, and build on that desire to point you in a lot of inappropriate directions.

I mean, it's cool to know how to shoot for a cover, or how to get in touch with picture buyers for travel mags or how to (try to) sell your work as travel stock. But the reality is that only a very small percentage of people who try will actually make it as travel photographers.

Which is why the first thing I did with this new video series was to throw out that assumption. Here's what I went with instead.


Travel is a wonderful thing. But it is also a time-compressed, experience-rich period in when the balance between photography and the other parts of your life can be a bit stressed.

Most of the time when traveling you are simultaneously serving several masters. You are an individual, experiencing personal growth as a traveler. You are a spouse. You are a parent. And you are a photographer.

To that last item, many photo enthusiasts who travel do so overburdened both with camera gear and photo expectations when they hit the road. Seriously, I often see people in fantastic destinations weighed down by 30 lbs of gear—and a surprising amount of internal pressure to Get the Shot—while they are on freaking vacation.

Here's the thing, and the the main premise of TTP: You're probably not being paid to shoot abroad. You are doing it for the joy, for the experience, to record your family's memories and just maybe get something killer for the wall in your photo den.


And that is our mission: to show you how to travel lighter, to exist most of the time as merely a traveler/spouse/parent who is present in the moment and get the most out of your experience—without ruining it for everyone by being Full-Time Photo Guy. And we'll show you how/when/where to efficiently slip out of that role to come back with some gorgeous photographs.

TTP is a holistic approach to travel photography. We're about photo vs. life balance when you're on the road.
__________


The Traveling Photographer: Fundamentals


In TTP:Fundamentals, you'll learn:

1. How to travel very efficiently both with respect to your pack list and your gear
2. How to co-exist with your traveling companions outside of your role as destination photographer
3. How to make your photography a nimble asset to your travel experience, as opposed to a zero-sum-game competitor
4. How to organize your thinking as a photographer (we steal techniques from pros, here) to become far more efficient as a photographer
5. How to make the most of a few pre-planned slices of time to get striking results without encroaching on the most important thing: your family's travel experience


I can't tell you how many photographer/travelers I have seen in how many fantastic locations who looked like they were geared up for a D-Day invasion. Two bodies. Street-sweeper zooms. Tripod. Spouse. Kids. Sightseeing/shooting with all of this in tow at freaking noon.

Almost invariably, they don't look happy. Seriously, WTF. What is the main goal here?

The sweet spot is in realizing that you want to be Clark Kent most of the time, and only when the payout is worth it to slip into a phone booth and become Super Photo (Wo)Man.

Our goal is to be your phone booth.
__________


With City-Specific Episodes


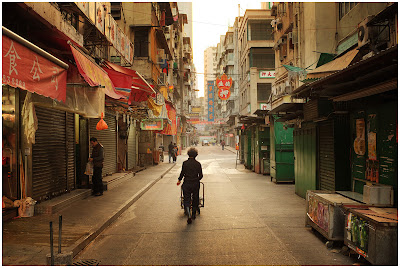
After TTP:Fundamentals, which is about two hours long, we hit the road to a series of five (this year) cities around the world: Hong Kong, Dubai, Paris, London and NYC.


In these cities, which should be on the short list of any traveling photog, we cover everything you need to know before heading to one of these destinations with your camera. We're like Your Man in Hong Kong—or wherever. We're your fixer.

We cover specific travel logistics as they relate to photographer/travelers, inside knowledge from local shooters and choose some well-curated photo experiences designed to help you get some trophy shots.


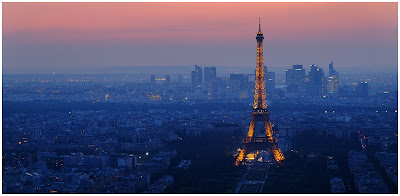
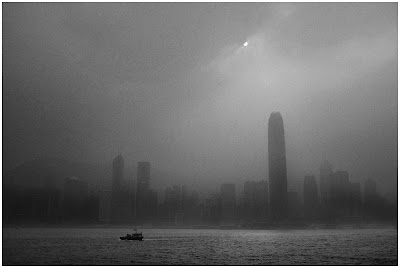
Looking for that killer skyline shot? It often needs to include the thing all of the iPad-toting tourists are standing on. We'll show you where, when and how to make your photo better.

Finally, we include some off-the-beaten-path experiences that will make your trip that much better.


Each city-specific episode is about an hour long. So far TTP:Fundamentals and TTP:Hong Kong have already been published. Dubai, Paris, London and NYC are set to follow in the coming months. After that, we will make the decision on whether or not to continue based on your viewership. (So watch early and often!)


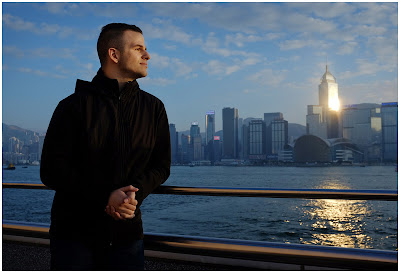
The "we" in this equation is myself and photographer/videographer Andrew Tomasino, pictured above. This is something we truly love producing, and would be happy to spend some time during the next few years of our lives doing so.
__________


Where to Watch The Traveling Photographer


In early 2013, web training behemoth Lynda.com acquired the rights to stream Strobist's 6-DVD lighting course, Lighting in Layers. The synergy was such I decided to pitch Lynda with what I considered to be a wildly ambitious idea: a city-specific, travel photography series, filmed all over the world.

They said yes.

(Retroactive note to self: Be careful what you wish for.)

Long story short, Lynda.com is now where The Traveling Photographer series resides.

Lynda.com is a subscription-based site with a phenomenal amount of educational content. The cost is $25/mo., with no contract needed. That means you can sign up for a month and binge-watch an insane amount of cool stuff in addition to The Traveling Photographer. Like the aforementioned Lighting in Layers collection. Or Steve Simon on street photography. Or lifestyle shooting with Nick Onken. Or how to nail copyright infringers with Attorney Carolyn Wright. Or how to use a view camera, with photo legend Douglas Kirkland. Or camera-specific video manuals. Or ridiculous amounts of detailed, professionally produced software (photo and otherwise) tutorials.

For $25 you can gorge yourself for a month until your eyeballs fall out and then walk away if you want. Whether you stay or not, it's kind of a no-brainer.

And because many thousands of companies use Lynda as their corporate partner for training, you may well already have full access at work. Check around at your company and see.

I hope you enjoy The Traveling Photographer series. Andrew and I had a great time producing it. And even more so, I hope it adds to your experience both as a traveler and as a photographer.
__________


:: My Lynda.com Author Page ::


__________

Do This: Sara Lando in US for Workshops in August


Whatcha doing in mid/late August? If you are within striking distance of Baltimore or Atlanta, you have a one-off chance to do something cool and fun that will change the way you approach your photography: spend a day (or two) with Italian conceptual portrait photographer Sara Lando.

After spending a couple years convincing her to come to the US, Zack Arias and I are this summer hosting Sara for two weekends of seminars and workshops in Atlanta and Baltimore. We are doing this because A) it's an awesome experience (trust us on that) and B) it's a lot easier than getting all you guys over to Dubai for Gulf Photo Plus.

Speaking of GPP, fun fact: instructors there get to sit in on any seminars/workshops they want on their day off. No offense to Arias, McNally, Heisler, etc., but I chose to sit in on Sara's classes during any chunk of free time that I had. And I learned a lot.

Sara marches to the beat of her own drummer, which is to say she's different. And she's different in a way that illuminates a critical blind spot for many photographers. She comes at her craft from a completely different and unique direction that fills a lot of gaps in my own (admittedly technically-based) thought process.

Her series on the psychology of portraiture was literally the most popular set of posts on Strobist in 2012, when they appeared. She's grown considerably as a photographer since then, as well as in her ability to communicate her thought process to other shooters.
__________


Three Choices—Or Choose All Three

Sara is doing three classes in each city—two half-day seminars on Saturday and a small-class, full-day shooting workshop on Sunday. (The Sunday classes are all full.)

You can sign up for any or all. The two larger-size classes (morning and afternoon on Saturday) also offer a combo discount.


Sat. AM: Rethink Your Approach to Portraiture


Saturday morning's class, entitled Behind the Portrait, is an exploration into about a thousand things you probably have not thought of in your own approach to photographing people.

Having spent some time in this class, I can tell you that it was both illuminating and painful. I was learning so many little things, yet wincing all along as I realized the lost opportunities I had previously squandered because I am far, far too technically oriented for my own good.


I think f/stops and shutter speeds and lighting when I should be thinking word association and gesture and subtext and connections and more stuff like that than I care to admit.

Are you the same way? Saturday morning will be about fixing that.


Sat. PM: Throw Away the Rules


The Saturday afternoon class is a seminar on the use of mixed media with/after your photography. In some ways, it is like taking your photography back to kindergarten art class. In others, it is as if you took it to a grad school psychology class.

To get an idea of where her free-form cardboard/string/tape/cotton-ball techniques have taken her, take a moment to visit the website for Magpies, the utterly unique project she produced using some of her home-grown multimedia techniques.


Quick story from her Dubai class, which will probably piss her off for my telling it. One couple was emotionally moved by her multimedia work to the point where they wanted her to shoot their wedding in that style.

But Sara's not a wedding photographer. Not does she want to be. The very thought of being one terrifies her. So she asked them the date, and politely explained that she was previously engaged to shoot on that day.

So they offered to change their wedding date to accommodate her. She had painted herself into a corner with what should have been a rock-solid bluff. So she shot their wedding.

My point: maybe you're a wedding shooter, a portrait shooter or whatever. I'm just saying it is possible there are doors you have yet to walk through that offer entirely new possibilities and potential for your work, be it personal or professional.
__________


The Saturday morning and afternoon classes (8/16 in ATL and 8/23 in Baltimore) are $99 each, or $159 for both. The 8/23 location, which I am hosting, is in Columbia, MD., between Baltimore and Washington. It's a great spot, with several great lunch choices within a two-minute walk. (Full details coming soon to attendees.)


Sunday: Small Class (Shooting) Portrait Workshop

PLEASE NOTE: The Sunday classes have already been filled.


If Saturday is a classroom experience with a full class size, Sunday's is an all-day small class, with 14 people max. This session includes both specialized instruction and hands-on shooting. There will be models onsite, and lunch is included (speaking here for Baltimore, you'll have to ask Zack for ATL.)

I popped into this class, too, while filming for my Lynda Travel project in Dubai. We were on a tight filming schedule, but I so wanted to stay longer.


If Dubai was any indication, we'll need some water and some large tarpaulins, among other things. I have not yet gotten my full marching orders from Sara, but I stand willing and able to execute. After all, I get to be onsite for this one all day.

The all-day small-class shooting workshop is $350, and you can get more details here. (This class is filled.)
__________


I Think Heisler's Wrong

In 2012 I engineered a week in which Sara would assist for photographer Greg Heisler for a week at Gulf Photo Plus. You may remember her writing about the experience here on Strobist.

Greg and I both thought Magpies was amazing. While talking about it, he looked at me and said, "You know, you can't teach that."

At the moment, I agreed. And maybe in some ways he is right. But I also realize that Sara's time with him was as an assistant/Strobist mole and she was super-busy just taking in as much as she could.

But the next year, attending her classes at GPP, I became increasingly of the mind that, yes, there is a lot of what she does that can be taught. And I was only too happy to be there taking notes. Just like I will be this time.

Sara will not turn you into a rubber stamp of herself. And nor would you want that. But spending time with her has opened up a few new channels in my brain that has changed the way I think about shooting people.

I highly recommend the experience as an ideal way to cap off your summer and charge up your creative batteries as you head into fall. Don't miss this.
__________


Full Details and Sign-Up Info:

:: Sara Lando US Workshops, August 2014 ::


Dates:

Atlanta: 8/16 - 8/17
Baltimore: 8/23 - 8/24


__________

On Assignment: Cellist Carolyn Rosinsky


I love shooting at mix. Especially when there are epic clouds on the move. And even more so while monitoring my Dark Skies app to know exactly when the rain will start falling on a OMGHowMuchDidThatThingCost? cello.

Just keeps things interesting, you know?
__________


Location, Location, Location

Every photographer should have a go-to location for shooting outdoor portraits. Mine is the Howard County Conservancy, who are smart enough to both recognize that they have a great place to shoot and to bend over backwards to work with photographers who like to shoot there.

It is really worth spending a little time to find locations like this in our area, be it private land (with permission) public land (find out your local park policies for photography) or hybrid areas like HCC.

In this case the HCC hosts, among many other cool buildings, a 1700's-era heavy timber barn that was moved, plank-by-plank, to enjoy its golden years on the grounds of the Conservancy. I love this backdrop and often start there while we wait for the cool light to arrive.


Because the barn has four sides, at least one of them is always going to be in full shadow. That's an easy thing for a couple speedlights to overpower, and speedlights was exactly what we were using to light Carolyn this evening.

I have pretty much ditched my Nikons for shooting people, unless they are running full speed on a full-sized soccer field or the like. Just like Zack did, there is a huge DSLR garage sale coming soon…

This is mostly because I have fallen in love with the compact size and color palette of the Fuji X-cameras. Check this: mixed with speedlights, I can carry three bodies, six lenses AND A WORKING STUDIO in a little Domke F-6 bag and a short sling case.


Photo by Dave Kile

Here's the full lighting gear pack we used for all three setups that night. The lights are LP180's—we're basically using two speedlight starter kits, now that I think about it.

My friend Erik Couse is acting as VAL on the key light. His job is to stay on axis and rotate the light to follow her face. As a photographer himself, he has a strong intuition about the latter which makes him much better than a C-stand.

Plus, he is way taller than me. So he's got that going for him, which is nice.

The fill is from a second umbrella'd LP180 (slaved, with the key light being triggered by a hot-shot-to-⅛" cord.) I have since switched to a 30-foot coiled version to simplify things.

This is all flash, which is to say we are totally overpowering the ambient that is seen in the BTS pic. Key light was full exposure, fill was about two stops down.

I love the monochrome palette of the photo, and the texture of the barn as opposed to seamless or a painted backdrop. I want to cut out a section of this barn and keep it in my garage. Sadly, HCC is not that accommodating.
__________


Dark Sky is Your Friend

After we shot some headshots against the post-sunset light, we went for something a little more contextual. The sky was, like, epic-opera cool. But that also meant approaching rain, which is a HUGE no-no for the expensive instrument of a concert cellist.

To cut it right down to the wire, we used my favorite shooting weather app, Dark Sky. It knows your exact location and aggregates a plethora of real-time weather data to tell you exactly your time-based weather profile.

You can look at real radar maps, etc. But what I like is the time-based way in which the rain data is presented. There is a timeline for your exact location and a graph of rain intensity expected over time. It's wavy and constantly updating as location-based radar location is absorbed and crunched.


Best yet, you can set it to sound an alarm when [light/medium/heavy] rain will be starting in your exact location in [x] minutes. OMG. Where was this thing when we had to cover the Preakness horse race with al those damned remote cameras? It's awesome.

So, skies were threatening but Dark Sky told us we were cool for 15 mins. We just walked our same lighting kit over to a nearby field and Carolyn uncorked an amazing soundtrack while we shot. I love shooting cellists.
__________


Just as before, Erik is skying the LP180 key light over her, paying attention to the orientation of her face. He is off to high camera right, from my perspective. I am in the grass on my belly with a Fuji X-E2 and a 14mm f/2.8 (21mm equiv.).

To my left, down low, is the fill light: the other LP180 in another umbrella on a collapsed compact stand. This light does not appear to be doing a lot, but you would miss it in its absence.

It is picking up detail on the side of the cello and pushing light out into the near camera left grass. It's also painting a specular highlight down the black chair, which gives it form without lots of detail. This is a dark picture. A ton of detail in the bass clef would kinda ruin it.

The fill light is sync-corded to the camera; the key is optically slaved. We are working really fast here (rain's a-comin') so we ballparked the key light exposure and had Eric tweak the distance if we needed to alter it. Also, I could do that with my aperture and tweak the nearby fill to compensate when needed.

The sky was all over the place. It was changing quickly with the clouds rolling in, so the shutter speed was changing, too. But mostly I just let the ambient exposure roll and adjusted when/if it got too far out of whack.
__________


Fuzzy Logic

A good selection of epic sky photos in the can, we went for something a little different. I pulled the 14mm and replaced it with a (follow the bouncing ball here) Diana 38mm plastic lens, on a Nikon adapter which was in turn fitted to an N-to-X-Mount adapter for use on the Fuji. The result: a normal-length, plastic squishy goodness.


I like to stretch for something different, especially when I am happy with what I already have. For Fuji portraiture I love the Diana 38mm just as I have used the Holga 60mm with full-frame Nikons in the past.

Pixel peepers hate this kind of stuff. Somewhere, there is a guy reading this whose forehead is starting to throb. (Embrace the anger, my DxOMark friend…)

The further I travel down this path, the more willing I am to go for evocative at the expense of [sharpness/exposure/focus/you name it]. Heck, I spent three days shooting in Paris in May without once putting a "real" piece of glass on the camera. I regret nothing.

I used to worry about what I was giving up. ("But it's not sharp!") Lately my concern is not for missed technical perfection, but more for the unexplored path.

In the end, this was my favorite image from the shoot. Plus, that look that she is throwing over her shoulder: I love that, too.

I am not married to Diana. But I sure won't mind hanging out with her for awhile. And in the context of a small camera bag full of possibilities and a dinky lighting kit, I'll be happy to follow where she leads.
__________

Discussion, via Twitter: use hashtag #StrOA165, and add "@Strobist" at the end of the tweet if is important that I see it.


Next (OA): Avatar


__________

Avatar


My last head shot had been getting a little long in the tooth. So on a whim the other day, I redid it.

Gotta keep things fresh, I always say. So I try to redo my head shot every seven years, whether it needs it or not.

As photographers, we only get to see one side of the equation—and that does not involve looking down the barrel of the gun, either. So being on the receiving end is always a learning experience. Even more so when you are on the shooting and receiving end.
__________


Your Brand

So, show of hands: how many of you are on social media? OK, a couple.

A head shot, AKA avatar, is your immediate first impression on other people. And in theory at least, you have the ability to present your first impression pretty much the way you want to. After all, it's not like you need to go out and hire a photographer to do it.

That said, from my position on Twitter (with lots of upstreamed questions/mentions coming from photographers) I see a lot of photog head shots. Some are great, and very conscious of the power of that first impression. Some… not so much.

And there are even some eggs. Eggs. Are you effing kidding me. Seriously.

A new head shot had been on my to-do list for a while, but there had been plenty of reasons to put it off. As a one-man band, my to-do triage list usually keeps anything that is not on fire or bleeding on the back burner.

But that time on the back burner allows time for ideas to percolate on non-urgent projects, just like a long-term assignment. So in the end it works out pretty well. And in thinking about what kind of a head shot I would want to do, the following thoughts had risen to the top:


Black and White

That's a photographer thing, I think. This would get heavy use as a visual brand for my social media channels, as well as a mugshot for any external publication for which I was a subject.

I wanted black and white rather than color. And to avoid the trap of thinking in both genres at once, I shot it only in B&W. Besides, Fuji (I used an X-T1 for this—more on why later) does really nice B&W files in-camera.


Al Dente

I am not generally slick or polished. (Or long-trousered, for that matter.) So the feel of an avatar/headshot/visual brand should be consistent with that. B&W, simple light, organic background, etc. Heck, I didn't even shave. Which is kinda of interesting and pretty spot-on in retrospect. The idea to actually get up, walk across the room and do a headshot hit me totally on a whim.

Which, I figured, was the ideal time to do it. Stream of consciousness.


Square

It would be most-used as a square, so I wanted to compose and shoot it as a square. In a pinch it could tight-crop to a vertical. But it should want to be square.


Warts-and-All

This is where the photog and subject thing collide. As photographers, we want to show people in an authentic way. As subjects, we wanna look good. That to me was the most interesting of the collisions that resulted in playing all of the parts in this production.

In the end, I figured I am 49. Sure, I can give myself smoother skin. But every wrinkle, every acne scar, every sunspot and every gray hair are well-earned. (No warts yet, but give me time.)

The photographer in me won out and I am glad it did. Having gone through that balancing act and come out squarely on the photo end, I hope to bring that experience to being better able to encourage my own subjects to go full-bore real. Or at least to move the slider a little more in that direction. In general things are way too plastic these days, IMO. I understand it, I guess, but I don't like it.


Neutral Expression, Camera Conscious

Again, going for real and direct here. Aim a camera at someone and the eight-year-old inside them hears their parent yell, "Smile!"

It's reflexive. Even so, I have always maintained that a neutral expression is far more versatile. It is a mirror expression. It will reflect whatever the viewer puts into it.

Ditto with camera conscious. I use the technique of, "Look over there for a second" all the time when I shoot people who are not making a good connection with the camera. It's a device. Maybe good for a manufactured visual moment, or a little variety in a shoot. But it will never have the impact of someone staring straight into the camera.
__________


Technical Stuff: Again, Simple

I used one light on a stand right behind the camera, bounced into the white suspended ceiling. At first it was an LP180 speedlight—pleeeenty of power for this. But while I am good at sensing how light will fall from a no-model-light flash onto a face when viewing from camera position, being the subject itself made that much more difficult.

So I swapped out to one of the LED monoblocs we bought for filming the Lynda Travel stuff. That way I could see myself in the context of the light, realtime.

How? Because of one little awesome trick.


Fuji Camera Remote


The Fuji X-T1 is the first camera to include access to the Fujifilm's Camera Remote App. It's free, but it only works with the new X-T1. (Presumably, other future Fuji cameras will include this capability.)

The app allows you to not only view a near real-time (seriously, the lag is almost nil) thru-camera image on your iPhone, but also to control the camera and shoot frames, too. You can remotely change many of the settings just as you would on the camera. You can even tap your screen to whatever you want to focus on and the AF point will jump to there.

I am only beginning to explore the app, but I know one thing: it makes the X-T1 pretty much the ultimate selfie cam. Zack used it to shoot close-ups of a cobra. (Meh. Weenie. I eat them...)

But seriously, I can see lots of cool possibilities for this. It's not fully baked yet, IMO. But it is a V1.01, and it is freaking free. So there's that.

And it worked great for this shot.
__________

As for post production, as I said I tried to resist the temptation to Barbie-fy my skin. In fact, I even jacked the contrast a little. Even more so in the wood grain of the basement closet door I used as a backdrop.

I duotoned it a little bit—warmer in the highlights, cooler in the shadows—to get the faux richness of the old Kodak Elite B&W paper, when you left it in the Dektol for a full five minutes. Again, old guy. Whaddya want.


Seriously, Do a Real Head Shot Already

If you are a photographer and you shoot people and you have not put some time and effort into making what is for you an appropriate, real head shot then I would submit that you might not be getting the concept, as they say.

It's your first impression. It's your brand. You have everything you need to do it, for free. Just do it, okay?
__________


Discussion, via Twitter: use hashtag #StrOA166, and add "@Strobist" at the end of the tweet if is important that I see it.

And if you know of a photographer who has really pulled off the head shot/avatar thing pretty well, shoot us an URL.


NEXT: Full-Sun Group Shot

__________

On-Assignment: Full-Sun Group Shot


If you have never done it before, lighting a group shot outdoors in full sun can be daunting. After all, sun is pretty bright. And your subject is pretty big and thus harder to light at a high level.

But with a leaf-shutter camera and a couple of battery powered monoblocs, you can easily own the sun and just about anything you can put under it.
__________


I have been using the Howard County Conservancy, well, let's just say a lot as a location. So I not only suggested some things I might be able to shoot for them as a thank you, but asked if they had any ideas themselves.

Turns out, what they really needed was a staff group shot. Not the first thing I would have gone with, but from their perspective it was important. And since my overall goal is to elevate their visual footprint, swapping out something as pedestrian as a group shot is pretty low-hanging fruit—and a lot more obvious to me in retrospect.

Oh, and can we get head shots of everyone while we are at it?

Sure we can. No prob.
__________


Follow the Bouncing Ball

It's been awhile since a full walk-thru OA. So what the heck, let's break this one down.

First thing is scheduling. With a flock of busy adults, the best time to schedule a group shot is when everyone is already together for another reason. So that, rather than light, is usually gonna drive the timing. In this case it was a staff meeting. They'd be done about 9:30am, and some people would have to leave quickly after that.

Not ideal—a mid-morning shoot without the benefit of early-morning golden light. I suppose I could do a sunlit group, but the light is already a little high at 9:30am in the summer. And who needs all that squinting? So let's nuke the sun and use flash.

My next stop is at Google Maps, to orient myself with the summer morning sun (really, I do not shoot very often in the morning…) and make sure we have somewhere that can be in full shade with a good sunny backdrop.


Our Spot and Our Gear


Here it is: the same Montjoy Barn that was our portrait backdrop in OA165. This morning, we'll be making use of its size and opacity. In the morning it throws a pretty good spot of shade.

You can see my gear loosely splayed out: A couple of Einstein e640s with Vagabond Mini Lithium batteries to power them. Light mods are a Paul Buff medium PLM (silver, with white diffuser) up top, and my go-to Photek Softlighter on the ground as fill. I put the PLM up top on the key because it is more efficient, and that is where I will need my power.

The camera: a (relatively dinky looking) Fuji X100s, on sticks. The latter being to keep it still just in case I need to swap faces in the group shot in post. Which I am not above doing.

The x100s is very important, as it has a leaf shutter which will allow me to sync flash at any speed that is below the t.1 time of the flash itself. I have posted in detail about the x100s and its near magical qualities in sun-nuking. We have also used this same gear pack for another OA if you want another look at how this stuff works together so well.


Grab a Baseline Exposure


From the camera position, let's grab a quick shot of the full-sun background. And this is a very specific shot, exposure-wise. I am going to shoot it at 1/1000th at f/8 at ISO 200.

Why 1/1000th? Because I can safely hit that sync speed with an Einstein e640 on half power. Which is a pretty good whop of light at 320ws. And I love, love, love that the e640 shows me my t.1 time at any setting, right on the display.

There it is:


Why half power? Recycle time. That's plenty of light to do what I need. So why go up a stop and double my recycle times? After all I am using batteries here. Common sense.

Why ISO 200? Best quality. Got plenty of light; no need to stretch the ISO.

Why f/8? Because that will easily hold focus through the group (and then some) on an 23mm lens/APS chip. And I am pretty sure I can hit f/8 at my working distance with an e640 on half power.

And if you notice, my scene is significantly underexposed. I don't want the ambient to be that dark in the final photo. But setting myself up with too-dark ambient means I create wiggle room to be able to alter my flash exposure and ambient exposure just by twiddling the camera's knobs. More on that in a minute.

Now let's make sure I can light this group at f/8 before they even get here—and without a flash meter.


Yep, just fine. That's a shot (at f/8 ISO 200) of the barn from approximately the same working distance from my light as my light will be to the group. As long as the laws of physics behave, I'm good to go.

Also notice that the barn is pretty warmed up. I am going with a ¼ CTO warming gel (how to gel a big mod, here) on the key light to make them pop against the blue sky.


Season to Taste

Since my ambient exposure for the background/ambient shot is too dark and I can still hit this aperture with my flash, I can do anything I want to the flash/ambient exposure right from the camera when I actually start to shoot these folks. If I want the sky lighter, I open up the shutter. If I want it darker (which I won't—it's plenty dark) I could still drop down to a 1/2000th and be safely inside my t.1 time.

Also, note that I am using a sync cord connected to the fill light and slaving the key off of that. This means I will not waste any critical microseconds in the process of close-shaving that sync time. Every little bit matters, and a radio remote can be your limiting factor in this situation at very high shutter speeds.

If I want my subjects lighter I can open the aperture and close the shutter to reclaim the background exposure. Or vice versa if I want them darker. Easy manual control of everything, all by starting with an exposure that is a little too dark. (And having a leaf shutter, of course.)


Here's the Scene, Ambient-Light Only


This pic, courtesy an HCC tweeter, shows the scene as it exists before the exposure shift and without flash.

It's pretty remarkable what the ability to drop the ambient and bring the subject back up with flash can do to a photo. And they have absolutely no idea what this looks like from their perspective. They pretty much just see this:


After they get in place, I will want to tweak my background/sky ambient for the final shot. In the end I lightened the sky a bit by opening the shutter up ⅔ stop to 1/640th of a second. And that's my final tweak.

Then I grab a couple of shots, loosen them up a little and show them a flashed pic on the back of the camera before we really get going. Because when they see it, they look kinda epic:


And that's usually what will get a small group over the hurdle and help them bring a little confidence (attitude, even?) to a group shot. Which a group shot really needs if you ask me.

A few minutes later and we are done. In fact total for the group (wrangling, etc.) we were about 15 minutes, even grabbing an impromptu second group (camp counselors) in the same light. It was a pretty easy swap-out.
__________


Next Up, Head Shots

If you have a group shot and head shots to do, always try to do the group first. If you're gonna be herding cats, you wanna do it while everyone is fresh and not bored. Then you can zero in on your head shot victims one at a time.

Plus, this way is more respectful of people's time. Do the group, then hit the head shots in order of who has to leave first. (Or who is most important, yada yada.) That gets everyone out as soon as possible.


For head shots we took about 30 minutes to quickly reset the lights and set up a full head shot studio inside the barn. With two big lights and soft modifiers on hand, we would have everything we needed as long as the batteries held out.

Nope. Not even. That barn door is in open shade, which the door also allows you to shape and control. So at that point all we needed was a clean backdrop. Paging Mr. Foamcore…


Doorways in open shade and a piece of foamcore: head shots don't get much easier than this.

You can get a lot fancier, to be sure. But for their needs it sufficed just fine. And it worked great to get people on their way, too, as we were literally knocking these off in about 30 seconds each.

No flash, so you can motor right through micro expressions. Just have your repertoire of corny jokes at the ready.
__________


So, easy morning—both for me and my leaf shutter/battery flash combo. The Conservancy is a tremendous resource for Howard County and I am quite pleased to be able to do anything I can to elevate their visuals and increase their exposure.

There are lots of other orgs like this; maybe even one in your county. Do yourself—and them—a favor by getting better acquainted.

Discussion, via Twitter: use hashtag #StrOA167, and add "@Strobist" at the end of the tweet if is important that I see it.


NEXT: Actor Ben Lurye

__________

Choosing a Camera


There is no perfect camera. So get that idea out of your head right now. Far better to think of any camera as a set of compromises. Size, speed, image quality, low-light performance, price, etc., can all be features—and they can all be liabilities.

You want image quality? Get an 11x14" film camera. Great for detail and tonal range. But sucks for action sequences / portability / low light performance.

Every camera is a compromise in at least one area. So to start, list your most important features on a sheet of paper and let that guide your choosing strategy.
__________


• If you want best-possible image quality, you might sell your car/house/plasma and buy a digital medium format camera.

• If you need super long glass and/or FPS speed (sports, nature, etc.) maybe grab a fast Nikon (or Canon) and a super-telephoto lens.

• If you shoot people, speed and high ISO performance might not matter as much as gorgeous color.

• I you travel a lot you might put a premium on your cameras being small and lightweight, with good low-light performance.

• If you are following a toddler around the living room, continuous AF performance may trump price.


So think about what is important to you (and your budget, of course) and begin your search for cameras using that as a compass point.

If you are old like me, you might be tempted to only consider cameras built around the dated form factor of film cameras to be the only cameras worth serious consideration. That's an age bias. Have it if you like, but be aware of it. To a twenty-year-old that doesn't matter any more.

Speaking of age, if I were just dipping my toe into the water I'd strongly consider a late-model used digital camera and a used lens or two. If I was not happy, it would be a cheap marriage to unwind. Within a year I could probably sell the lot on eBay for a couple hundred less than I paid, max.

And if I was happy it would be a great platform to build on. Once committed, my next body might something current and the original body goes to a second/backup. Either way, I would not expect to be using the camera after five or six years.

Point is, you don't have to jump in the deep end. Buy one body and a lens or two. Maybe buy used from a shutterbug friend, knowing the camera implicitly comes with ad hoc tutoring. (And a good outlet to borrow/lend lenses, bodies, etc.)


I spent over 30 years with Nikon film and digital SLRs as my primary cameras. But the further I got away from shooting for newspapers (which at the time had included lots of sports photography) the more my priorities shifted. Here is what is important to me now: small, lightweight, good image quality, great in low-light and quiet/unobtrusive. That led me to move to mirrorless (Fuji) a couple years back.

Pictured at top are the cameras that currently get more use than anything else I have (save maybe my iPhone): a Fuji X-E2 and a Fuji X100s.

Whatever camera style/brand you are considering, you can use the 'net to easily scope out how other photographers are using it and what kind of image quality it has.

For instance, try this: click on the night photo just above, which will take you to its Flickr page (in a new window). Scroll down beneath the photo's page where it says "Fujifilm x100s" (or just click here) and you go to a page that will show you lots of different photos shot with exactly that model of camera.

And here's the thing: clicking on that link from just about any camera icon on a Flickr photo page will quickly show you that you can make amazing photos with just about any current camera. So don't sweat it or pixel peep too much.

Instead, focus on how you will be using the camera and what features are truly most important. Then let that drive your choices. And understand that the camera you use today probably won't be the camera you are using in five years.


NEXT: Lenses


__________

Choosing Lenses


If you date your cameras, you marry your lenses. That's because, unlike digital cameras, a well-chosen lens can serve you for a very long time.

I still have one lens that I bought thirty two years ago. And I bought it used. I doubt that will be the case with any of my digital cameras, ever.

In the past, I was a lens speed freak and was willing to spend great sums of money to have very fast glass. I now realize that lust was misplaced. If I had it to do over again (and I do, and have) I would lean more on reasonably fast primes and here's why.

Moderately fast primes are (much) lighter, (much) cheaper and often just as sharp (or sharper) than their speedy siblings. For Nikon shooters, the Nikon 28, 50 and 85 f/1.8 trio of lenses are great examples of this. They weigh next to nothing in my bag and offer great performance. Also, I have moved away from primarily using fast zooms. Rather than a fast 24-70/2.8, I'd now opt for a trio of fast-ish primes and a decent, slower zoom to back them up.

This way, you get a stop (plus) faster at each focal length, backups throughout the 24-70mm range and you lose the most daunting aspect of the speed zoom: an expensive single point of failure.

In general, remember this when it comes to ultra-fast DSLR lenses: you pay through the nose for them when you buy them. And then you pay again, in weight, every time you lug them around. Remember that cameras have amazing high-ISO performance these days. And they are just going to get better as we go.


As for my Fuji lenses, it is pretty hard to go wrong with their primes (although I'm not a huge fan of the 60mm macro…) But the others are small, gorgeous and fast. I love the built-in 23mm (35 equiv.) of the X100s. It's sharp wide open and it has beautiful flare when you point it right into the sun as seen above. It's my most-used lens. Which is a good thing, given that it's welded to X100s.


Painted Hall, Greenwich, UK with Fuji 14mm/2.8

Along with that, the 35/1.4 (50mm equiv., seen at top on left) and 14/2.8 (21mm equiv., on right) are my go-to lenses on the interchangeable lens Fuji bodies. If I am shooting tight headshots, maybe the 56/1.2 in the middle.

As a backup for the lot, I like the 18-55mm f/2.8-4.0 kit zoom (not shown). Which, although not a speed lens, is great optically and has stabilization.


Actor Ben Lurye, with Fuji 18-55 f/2.8-4

Good performance from a kit lens (the zoom that often comes packaged with a camera) is not a given, as many of them are crap. If you are using a kit zoom as your main lens, know that it will be be sharpest near the middle of the aperture scale—let's say around f/8. In fact, most lenses are great at f/8.

If you like to hang out close to wide open, grab a (used, if necessary) prime at your most-used focal length. You'll be a happy camper—and have a backup if needed.
__________


What to buy? And when? That should be driven by what/how you shoot.

Here's my thinking on lens progression, driven by how I shoot. Most of the time I am going to go out with a single, prime lens. I like the size, the weight, the speed and sharpness. Actually, I also like the discipline of having a single focal length. It helps me to see better.

With a new system I'd build out my wide/normal/short-tele primes, then get a decent wide- to short-tele zoom as a backup or for times when I would want one-lens variability. Only then do I start going for more exotic lengths if needed.

The reason is simple: most of my work will be done with the bread-and-butter focal lengths of moderate wide to short tele. So I want good quality, speed and backup in those lengths before I start to get crazy with a superwide or whatever.

You can easily try out a lens for no risk. Buy a good example used, from someone with a good return policy. If the lens is a dog, return it immediately. If it is good enough to where you want to keep it and play, you can always resell the used lens for about what you paid for it within a year or two.

So, very little risk. (In fact, if I was going to need to rent a lens for more than a week I'd do it this way. Your rental would be practically free.

And obviously, if you love a lens and decide to marry it and keep it forever that's best possible case.


NEXT: Lights


__________